CLICK ON THE VIDEO TO TOGGLE AUDIO ON/OFF
News
2021.07.18 · Official launch of the LEDfoot website with preorders.
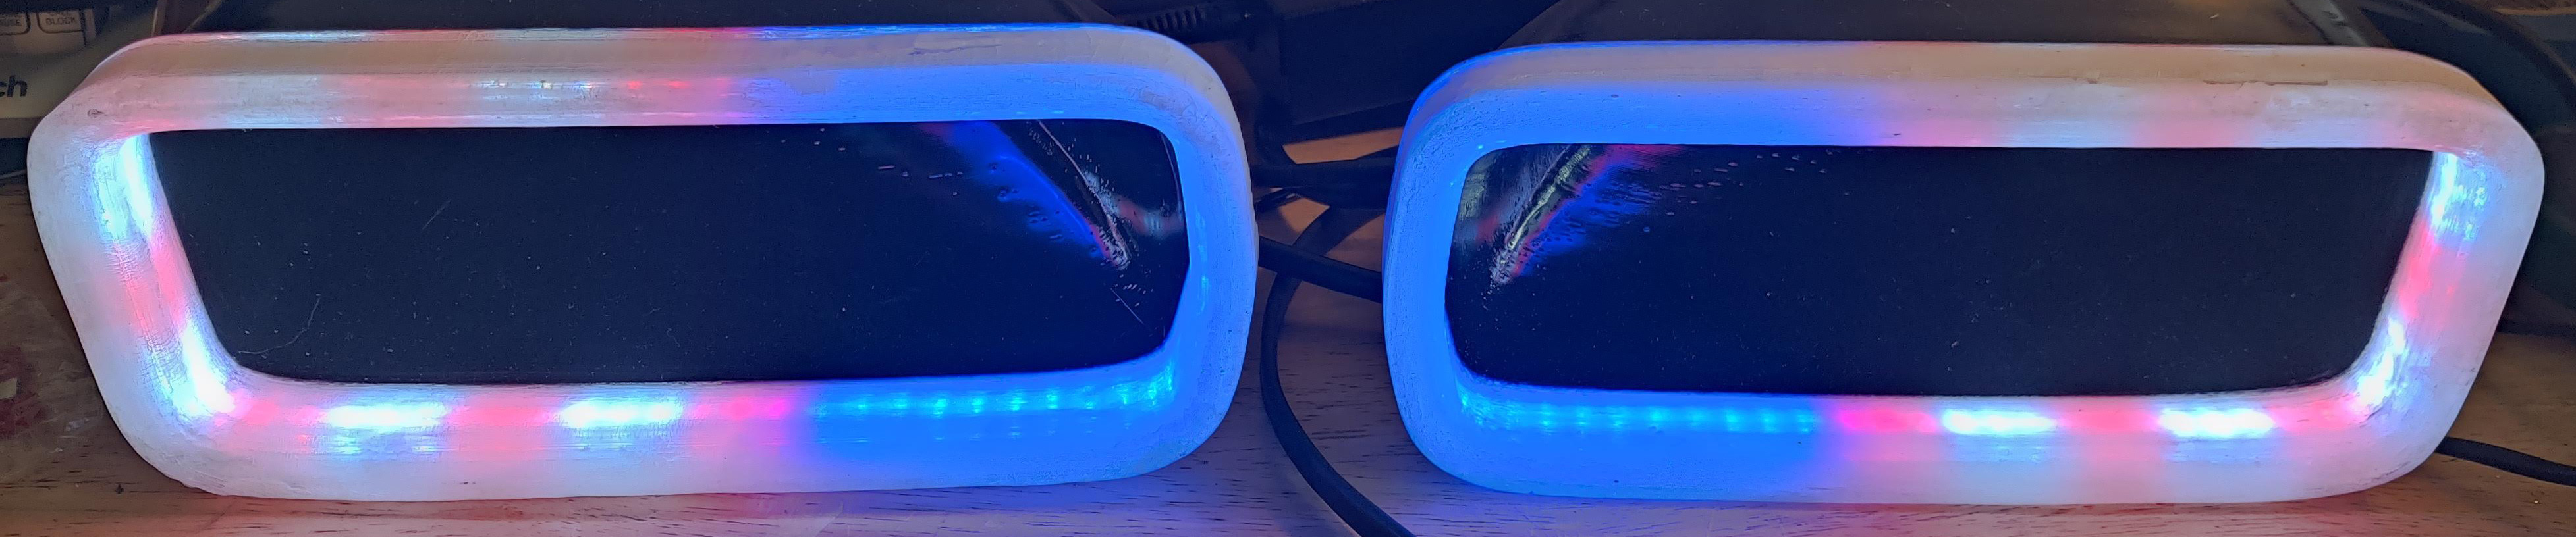
Introducing World’s First Reactive LED Ram Air Intake Controller
LEDfoot is a first-of-a-kind integrated controller developed in collaboration with the JA LIT Airscoops, with its initial release focusing exclusively on the Kia Stinger GT platform. LEDfoot offers a number of unique features and properties:
- System that Responds to Your Driving Style — LEDfoot is first-of-a-kind automotive LED controller capable of adjusting LED output based on the car’s turbo boost level. It can even detect and react to the BOV pressure release. Given the analog nature of the system, even with same settings no two boost will look exactly the same.
- Express Yourself — Your car is not just a car. It is a four-wheeled powerhouse whose presence and audio-visual output is a unique and direct extension of you, its driver and owner. LEDfoot is the most flexible and extensible automotive LED pattern controller that empowers you to edit existing or design entirely new light patterns, and even share them with your friends. No, we are not talking about a simple customization of the default color (and yes, you can do that, too). LEDfoot uses a javascript-like programming language that can be used to design and tweak every aspect of your pattern live.
- No Phone App Needed — No need to worry about battery-draining blackbox apps with potentially questionable permissions. LEDfoot is accessible via a built-in secured Wifi Access Point and its interface is accessible via a Web Browser regardless the platform, be it a laptop or a smartphone.
- Minimal Engine Bay Footprint — While LEDfoot is protected by a rubbery shell and therefore resistant to elements, it is also so small that it can be easily stowed inside the engine bay fuse box, making it effectively both invisible and safe from the harsh engine bay environment.
- Continually Evolving — LEDfoot is not just a hardware that becomes outdated as soon as it is released. It is a high performance LED strip controller capable of 200+ updates per second whose software is continually being extended with periodic releases of new downloadable patterns.
- Accurate Color — Unlike off-the-shelf controllers that tend to “extend” brightness by using other color channels, resulting in a brightest red color looking more like a purple, LEDfoot is carefully calibrated to provide the best colors possible using the JA LIT Airscoop platform.
- Powerful UI — LEDfoot is based on the Pixelblaze platform that offers unprecedented power and flexibility and a user-friendly interface.
- Easy Install — If you already have JA LIT Airscoops installed, replacing the default controller should not take more than a couple of minutes. It is also compatible with other mods, such as JB4, and, because of its minimal power draw, it can even share the fuse tap with the BMS’ WMI kit.
- Handmade in USA — Every single unit is handmade in USA with special care and attention to every detail. Each unit is extensively tested to ensure it meets the quality standards of the very first unit that is now permanently installed inside author’s 2018 Kia Stinger GT2.
LEDfoot in Action
Please note that the following footage may not be indicative of the actual colors due to camera’s direct exposure to the LED output.
KITT-Like Preset Idle Demo
Patriot Static Pattern
LEDfoot Pattern Demo (WITH AUDIO)
KITT-Like Pattern Boost Cycle Demo
KITT-Like Idle Rev Up Demo (WITH AUDIO)
Patriot Pattern Boost Cycle Demo
Solid Color Boost Cycle Demo

|

|

|
LEDfoot Editor with Live Monitoring
Get LEDfoot
LEDfoot is now available for its post-promotion price of $150 + Shipping Costs (all prices are in US Dollars). Please note that orders from the continental USA do not have any additional shipping charge, while orders from other currently supported regions have an additional shipping charge (Canada $30, Australia $40). Please note that due to COVID-19-induced difficulty in accessing select hardware necessary to build a LEDfoot controller, it may take several weeks before your preordered unit may ship.
Please note all the existing owners of the JA LIT AirScoops should preorder/purchase LEDfoot directly through this site. Any new purchases bundled with the JA LIT AirScoops should be processed through the JA LIT Airscoops order page. For bulk orders or orders outside USA and Canada, please contact me directly.
Considering each LEDfoot is handmade, the final product may visually deviate somewhat from the photo above. Rest assured, however, that each individual unit will be given the same special attention as the one permanently housed in the author’s car.
IMPORTANT! All transactions are managed through the Paypal service and are subject to service terms. In addition, before purchasing, please review the Equipment Purchase Agreement. Please note that you can only access the purchase option once you have reviewed the agreement. Any purchase request will be processed with the expectation that you have reviewed and understood the agreement.
Please note that every LEDfoot is extensively tested before being shipped and it is highly unlikely there will be an issue with your order due to hardware failure. That said, in the unlikely event you receive a product in a damaged packaging or a unit that is not working, please report it immediately.
RETURNS will be honored within 90 days of Buyer receiving the item. All returns and replacements require a return authorization which can be requested by contacting the Seller. For any kind of a return Buyer will be responsible for covering the return shipping cost. Dead-on-arrival (DOA) LEDfoot units or ones that fail within first 90 days will be replaced or given a refund, as per Buyer’s preference. Refunds will be processed after the returned item has been received by the Seller. Refunds are subject to Paypal refund processing times. Any item with visible damage due to Buyer error will not be issued a refund. Please note that Paypal charges sellers a credit card transaction fee (as of July 2021 this amounts to approximately 3%, or $4-6 per order, depending on the shipping costs). As a result, when issuing a refund, any refund will be reduced by this same amount. Considering that Paypal assesses this fee on all orders, including preorders, preorders that are cancelled as per Buyer’s request prior to shipping of the LEDfoot will be subject to this same fee. The only exception to the fee will be orders that are for whatever reason not possible to fulfill by the Seller, which will be issued a full refund.
Please review the Equipment Purchase Agreement for important information prior to purchasing LEDfoot.
Installation Instructions
To install the JA LIT AirScoops, please follow the manufacturer’s instructions. Once those are installed, the addition of the LEDfoot and the replacement of the LIT controller should take only a couple of minutes.
1. Open the engine bay fuse box and locate a circuit you wish to tap to power the LEDfoot kit (Figure 1 below). Make sure that you identify a fuse slot that is not hot while the car is powered off, to prevent the battery drain. You can share the recommended BMS WMI slot, as per Figure 2 below.
IMPORTANT! If you are planning on using a separate empty slot for the LEDfoot, make sure its hot pin is connected to the left fuse tap pin (one farther from the cable). If you are unable to locate such a slot and fit the fuse tap in a way that does not collide with the extruded plastic edges, place another 20AMP spare fuse into the bottom open slot of the fuse tap and you will be able to then plug it into any slot, regardless of which pin is hot.
")
Figure 1. LEDfoot Kit
")
Figure 2. Connecting LEDfoot Controller
2. Once installed, connect the cabling (ground, boost sensor, and the LIT cable) and route the cables going out of the fuse box through the right corner of the fuse box, as per Figure 3 below. Make sure that the cabling is properly routed to the right side of the fuse box (see Figures 2 and 3) and is not getting pinched. Unlike the Figure 2 that portrays the pre-production unit, there should be one foot of LIT cabling extending from the LEDfoot (as is the case on the Figure 1) which you can use to strategically position the connection between the LEDfoot and the LIT cable ideally inside the fuse box, or immediately outside it (or more specifically to the right and below of the fuse box). If the LEDfoot connector is placed in a way that it connects to the LIT cable outside the fuse box, make sure that only the portion of the LEDfoot connector protected by the black heat shrunk insulation is outside the fuse box. Note that LEDfoot only requires only 3 pins to connect with the LIT adaptor and that one of them is left unused. Make sure to orient the connector correctly and that in the process of connecting you do not bend any pins. If you do bend the pins, gently correct them with a toothpick or other small stick-like device and try reconnecting. When closing the fuse box, there should be enough space inside for the LEDfoot to comfortably reside on top of the fuses (Figure 2) and to route the cabling with only minor pressure being required to close the fuse box.

Figure 3. Routing LEDfoot Cabling
3. Lastly, route the boost sensor cable (white wire) to the boost sensor and connect it using included positap to the topmost cable (from the Figure 4 perspective) coming out of the sensor. If you are not using JB4, this cable should be white with a black tracer. If you are using a JB4, this cable will be yellow.
IMPORTANT! LEDfoot is designed to support boost levels up to 30PSI, which should be more than sufficient for all but the most extreme of engine modifications, such as significantly larger turbos. Therefore, if your car is known to produce boost well over 30PSI, please contact me to discuss ways how you can ensure that the voltage coming from the boost sensor does not damage the LEDfoot controller.

Figure 4. LEDfoot Sensor Cable Installation
4. Once the installation is complete, turn on the car. Your LIT AirScoops should light up as soon as the car starts using whatever the last pattern that was selected during production and testing. To change LEDfoot settings, connect to the controller by connecting your smartphone or laptop WiFi to a “LEDfoot” hotspot using the password provided on your order confirmation page. Then point your browser to the 192.168.4.1 address. You are strongly encouraged to create your own unique password. See the FAQ section below for information on how to do this.
Patterns
To request the latest version of LEDfoot-specific patterns that are shipped with the LEDfoot, send an email by clicking here. Pixelblaze firmware updates can be (re)downloaded directly from the Pixelblaze website.
Frequently Asked Questions
How long will it take to get my order?
The initial preorders may take longer, particularly considering the post COVID-19 global inventory shortage. Wait times up to a month or longer may be expected until there is a built-up inventory. Once the manufacturing process has caught up with the orders, most orders will ship within a week to allow for stress testing of each unit and thereby ensure it meets and exceeds the same quality standards as the very first unit ever built.
Where do I plug in the add-a-circuit fuse tap?
Depending on the Kia Stinger GT model, you may want to use the same vacant fuse slot that is recommended for use with the BMS WMI kit and plug in the WMI into the bottom (vacant) slot on the fuse tap. LEDfoot together with the JA LIT AirScoops has a relatively small power draw and it is possible to add them to another existing circuit. Please consult your car manual for the appropriate specification to determine whether sharing a particular circuit is appropriate. Lastly, make sure that the circuit you pick is one that does not remain live after the car has been turned off, so that you do not drain your battery.
How do I connect to the LEDfoot?
Simply use your smartphone or any other WiFi enabled device with a Web browser and connect to the “LEDfoot” Wifi that will become available as soon as the LEDfoot is powered on. Use the initial password provided in your order confirmation (you can customize this password later) and point your browser to 192.168.4.1. This will get you to the landing page where you can select your presets. During this connection your device (smartphone or a laptop) may report that it has no internet connection and that is ok (LEDfoot offers a standalone hotspot that does not connect to the internet).
How do I change LEDfoot WiFi password?
From the landing (pattern selection) page, click on the WiFi tab and select option to restart in Setup mode. Once you activate this option, LEDfoot will reset its WiFi back to a passwordless hotspot whose name starts with “PixelBlaze”. Reconnect your device to the newly created hotspot (the old LEDfoot one will cease to function) and once again point your browser to 192.168.4.1 (depending on your device, you may be automatically routed to the landing page as soon as you connect). Once the landing page loads, specify the AP mode, set your hotspot name (default is “LEDfoot”) and password, and apply settings. You will then have to once again reconnect to the newly created WiFi hotspot. As long as you decide to use the AP mode and as long as your device (smartphone or a laptop) is connected to the LEDfoot WiFi hotspot, it may report that it has no internet connection and that is ok and expected (LEDfoot’s standalone hotspot a.k.a. AP mode does not offer connection to the internet).
I have installed the LEDfoot but the LEDs are not powering on and I cannot access it via WiFi.
Please make sure that your add-a-circuit fuse tap is placed in a slot where the power is coming the pin connected to the left side of the add-a-circuit, as opposed to the right one which is closer to the outgoing wire. If you are unable to locate such a slot due to fuse box configuration, simply put a spare 20AMP fuse into the bottom slot of the add-a-circuit.
How do I get started?
Please see the installation instructions above.
I have selected a pattern but it does not appear to interact with my boost levels.
Please note that only patterns that have the “+ BOOST” in their name are by default configured to work with LEDfoot’s boost sensor. Others may need to be adapted and/or may be included in the future releases of downloadable patterns.
I have selected a pattern designed to work with the car’s boost sensor, but while idling the pattern acts as if I am generating boost.
Given that no car is exactly the same in terms of its idle values, you will want to edit the value of the “zeroOffset” variable (by default it is conservartively set to 0.54). To do this, first enable to “Vars Watch” option and observe what is the value read by the “analogIn” variable and assign the zeroOffset the highest observed value of the analogIn while the car is idling. Don’t forget to save the pattern once done editing.
How do I edit the pattern?
Patterns are written in a simplified form of Javascript and can be edited live. Please consult the documentation provided below the pattern editor for more info. Once done, make sure to save your changes.
How do I create a new pattern?
In the main window, click on the “clone” next to the pattern that you wish to build off of, or simply click on the button “New Pattern”. Once done editing, make sure you give the pattern a unique name and save it.
How do I tweak existing pattern?
All custom patterns designed for LEDfoot are annotated and provide dozens of customizable parameters. They can be edited inside the editor by adjusting their values. While this is doable via any device, it is usually accomplished more easily when using a laptop or a tablet due to access to a larger screen and potentially physical keyboard. Once edited, don’t forget to save the pattern.
How do I customize a color of a pattern?
Depending on the pattern, it may or may not have customizable colors. For instance, the Patriot Pattern that uses specific colors is, by default, not customizable. On the other hand, the Solid Color + Boost pattern’s colors are customizable and are annotated at the top of the text file accordingly. Most patterns allow for customizations via a small widget where you can pick your color via a color picker. Please note the caveats of picking such colors through a color picker. Namely, color picked colors will only work when editing a pattern. Selecting such a pattern directly from the main Pattern Selection view will not take such customizations into account. If you wish to make such customizations work from the main Pattern Selection view, you will want to go to the “Edit Pattern” view, enable the “Vars Watch” option, and observe changes to the color values (typically outBlue, outGreen, and outRed) made by the color picker widget, and then edit the pattern variable values in the editor to match those. Finally, don’t forget to save the pattern once done editing.
When I restart the car, will the LEDfoot remember my previously selected pattern?
Yes. As long as you have saved your pattern, the LEDfoot will restart with your last selected saved pattern.
How can I safely edit a pattern?
Simply click on the “clone” button and save it under a different name. Then, if you end-up breaking the code or corrupting the pattern, you can always re-clone another copy.
I tried to edit a pattern and it somehow got corrupted and forgot to backup the original one. How do I restore the original?
You can simply re-download the latest collection of patterns specially designed for the LEDfoot using the pattern section of this page, and then copy and paste the relevant pattern.
How do I share my own patterns?
Simply copy the code and send it as a simple text file or insert it into a body of an email or forum post. The person receiving the pattern can then create a new pattern on their LEDfoot and paste the code inside it and save the pattern.
How many patterns can I have?
LEDfoot comes with internal storage whose free space is shown in the top-right corner of its Web browser-based editor. Typically, you can store dozens up to 100 customizable patterns. If you ever run of out space, you can always backup unused patterns and delete them from the device to make more room.
Where can I get more patterns?
In addition to what will be provided through periodic updates and made available on this page, you can also download any of over customizable 100 patterns available on the Pixelblaze website. You are also encouraged to share your creations which will then be included in future LEDfoot updates.
Is it legal to have LIT AirScoops and the LEDfoot installed on my car?
Given the complex array of National, State, and local Laws and Ordinances, it is the user’s responsibility to ensure that the LIT AirScoops and the LEDfoot comply with the applicable Laws and Ordinances. If in doubt, the user should use the “off” pattern while driving on public roads.
Have another question that has not been covered here?
Please feel free to contact me.
Support
Please do not hesitate to contact me should you encounter a problem or an unanswered question regarding installing or using LEDfoot.